Yamaoka Estate
Yamaoka Estate guide in Dead by Daylight: Family Residence and Sanctuary of Wrath, how bamboo changes chases and their clock and numpad callouts.
Go to the calloutsYamaoka Estate map guide
MapsFamily Residence · Sanctuary of Wrath
Balance
Score from 1 to 5 for each variant: the lower, the more survivor-sided.
- Family Residence ISurvivor-sided
- Family Residence IISurvivor-sided
- Sanctuary of Wrath IKiller-sided
- Sanctuary of Wrath IIKiller-sided
Map callouts
The callout numbering for Yamaoka Estate in Dead by Daylight includes 4 layouts for the clock system and 4 layouts for the numpad system. Use them to call out generators, hooks, pallets and the killer's position to your team and coordinate every match.
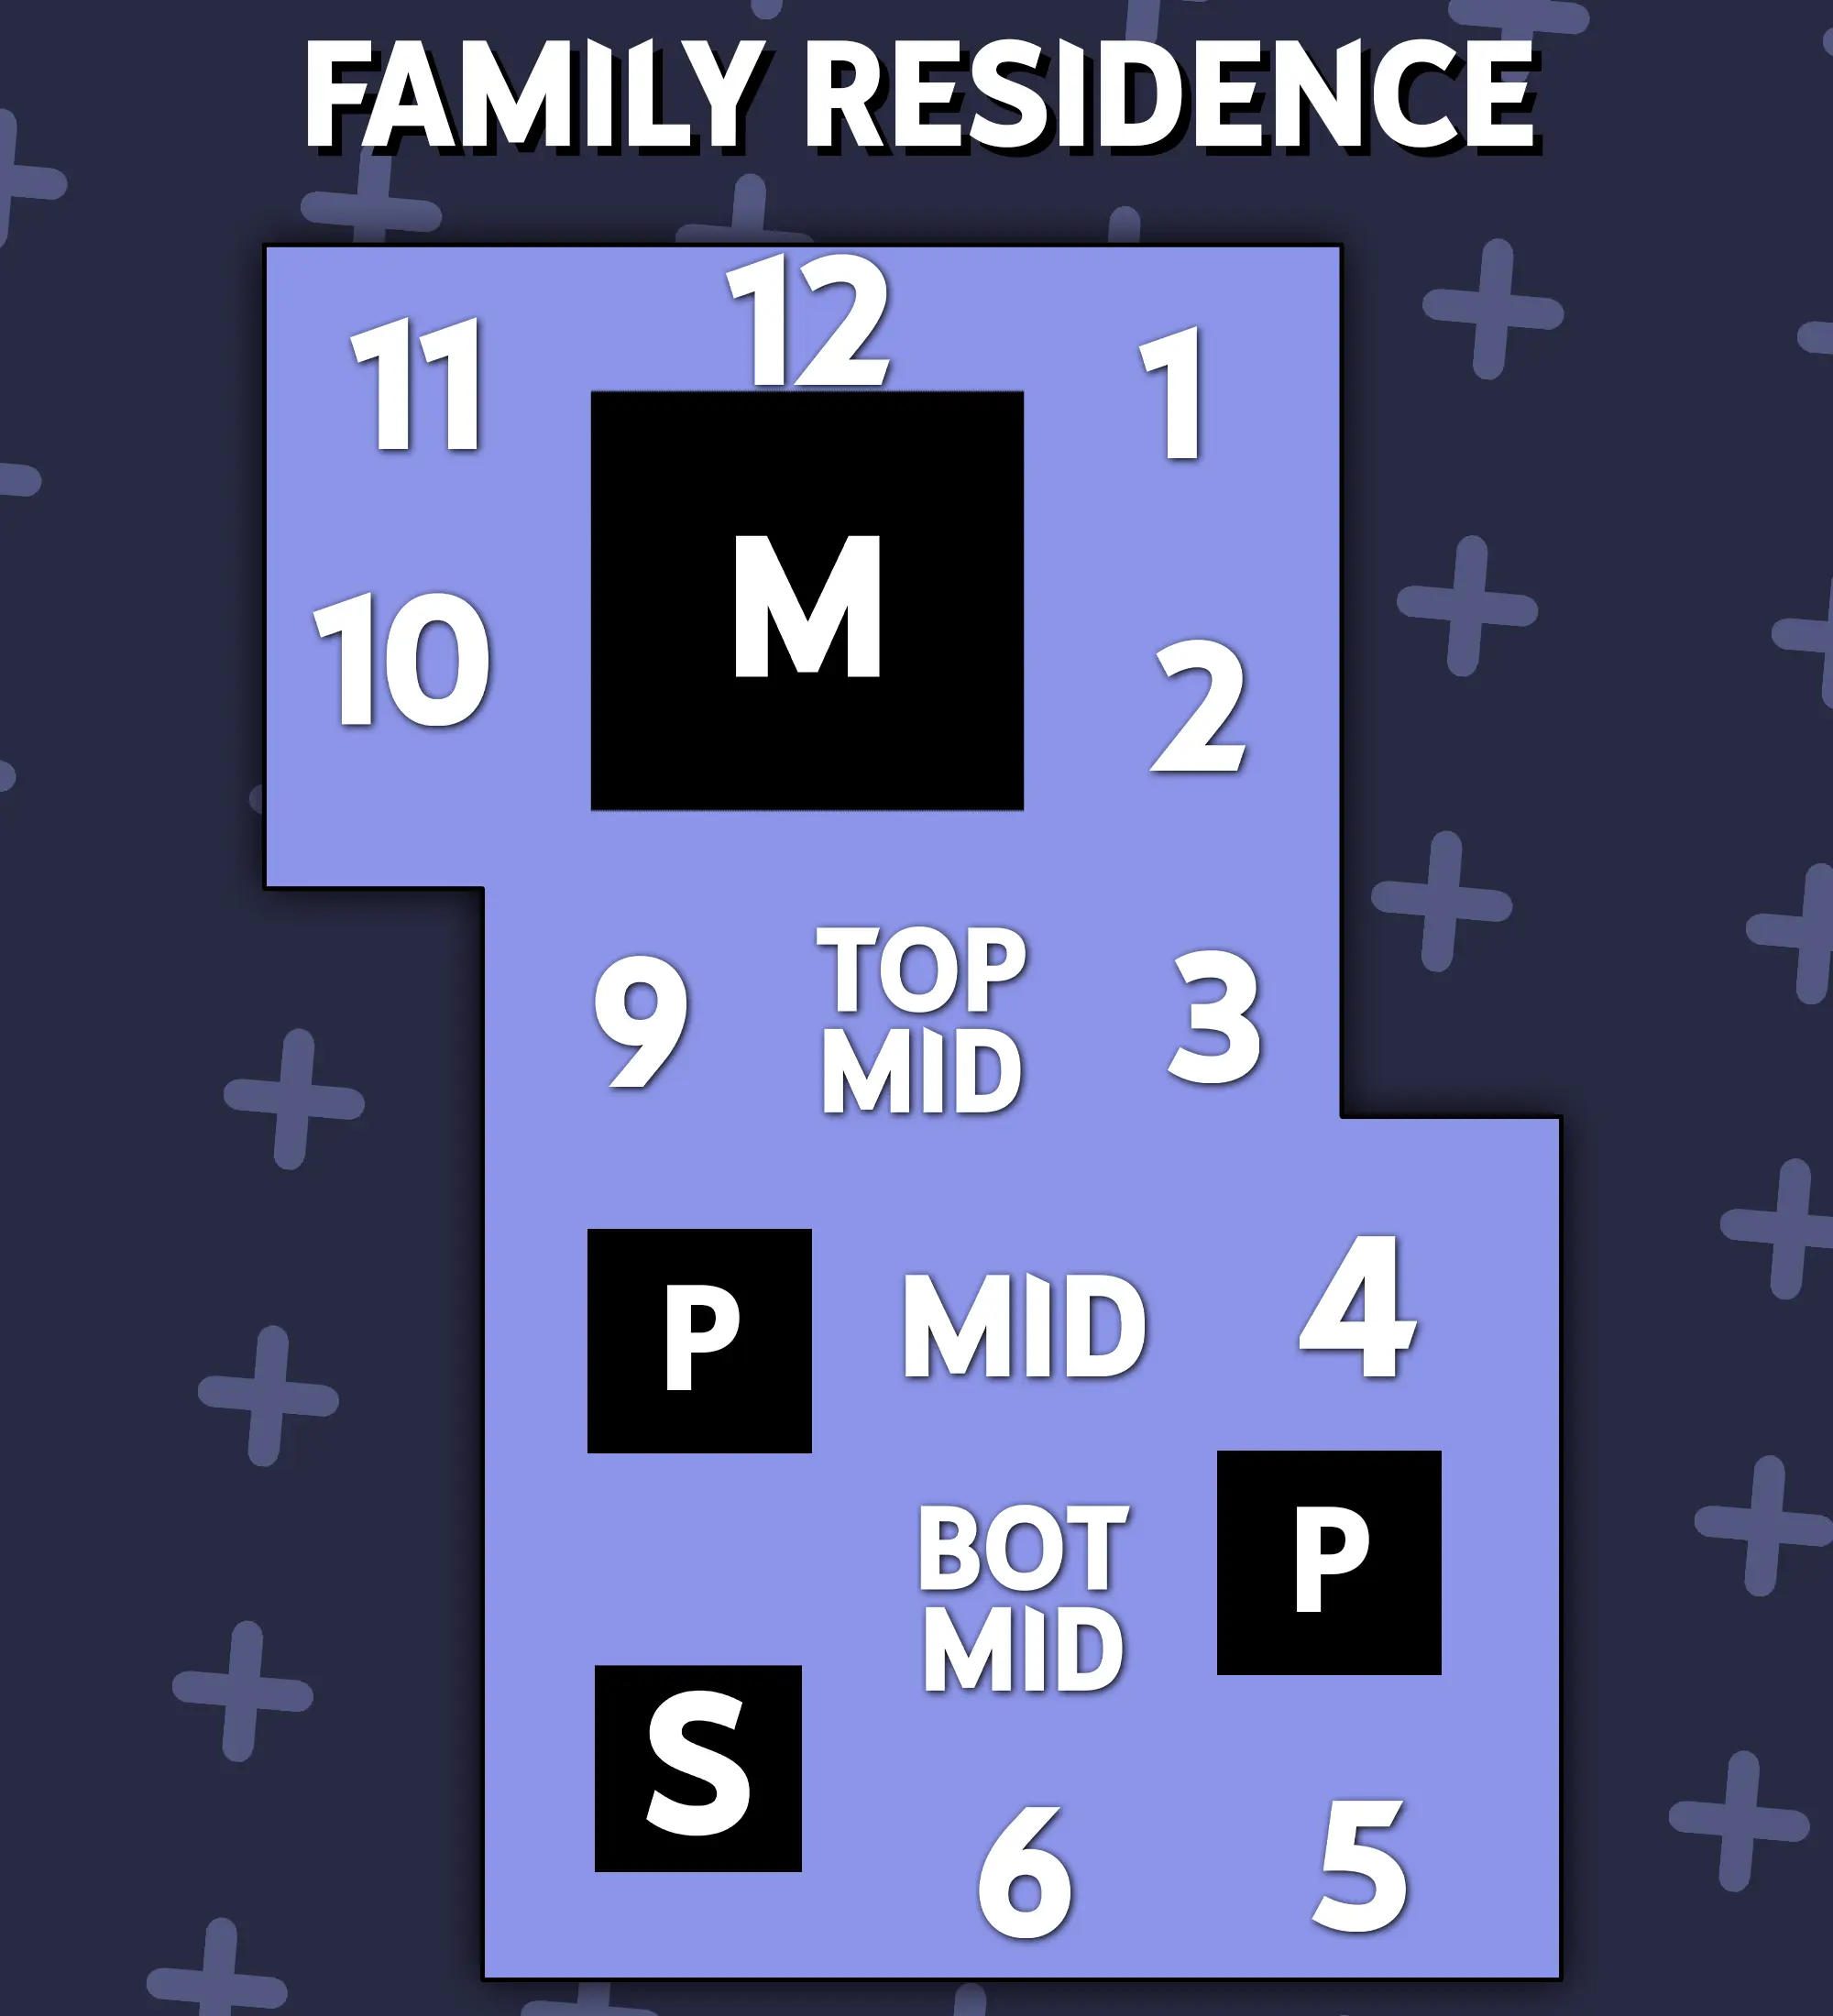
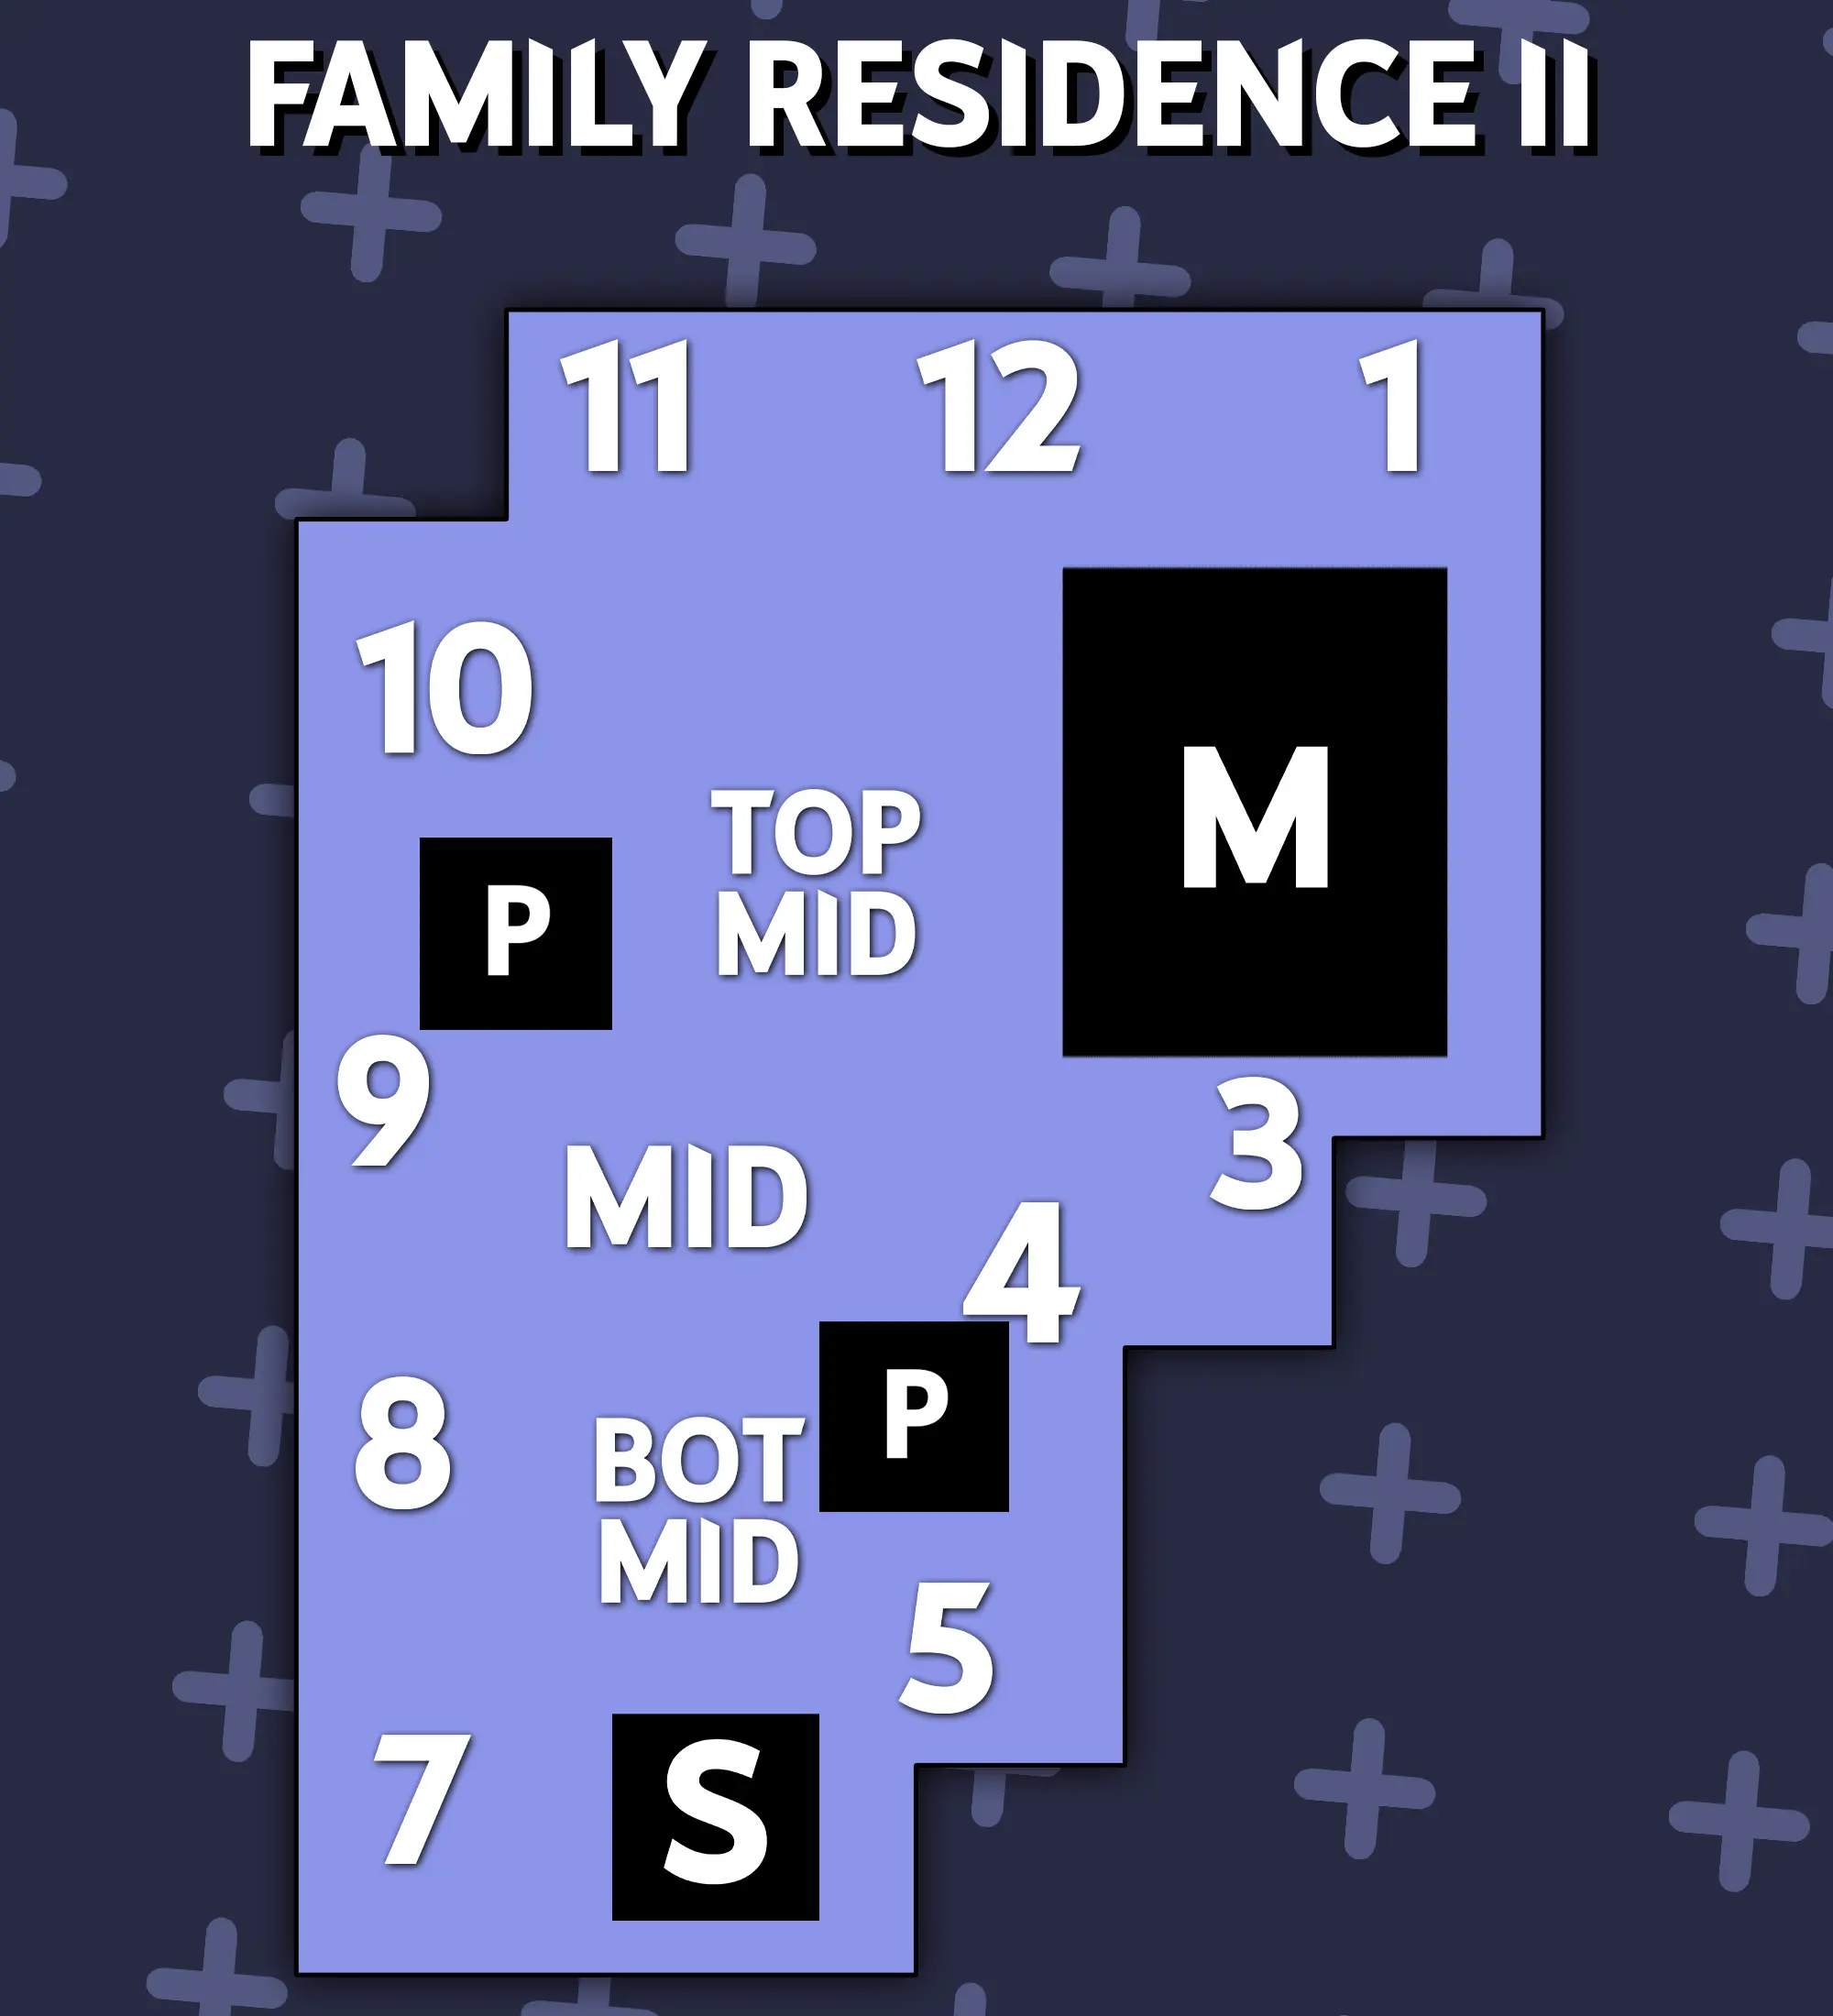
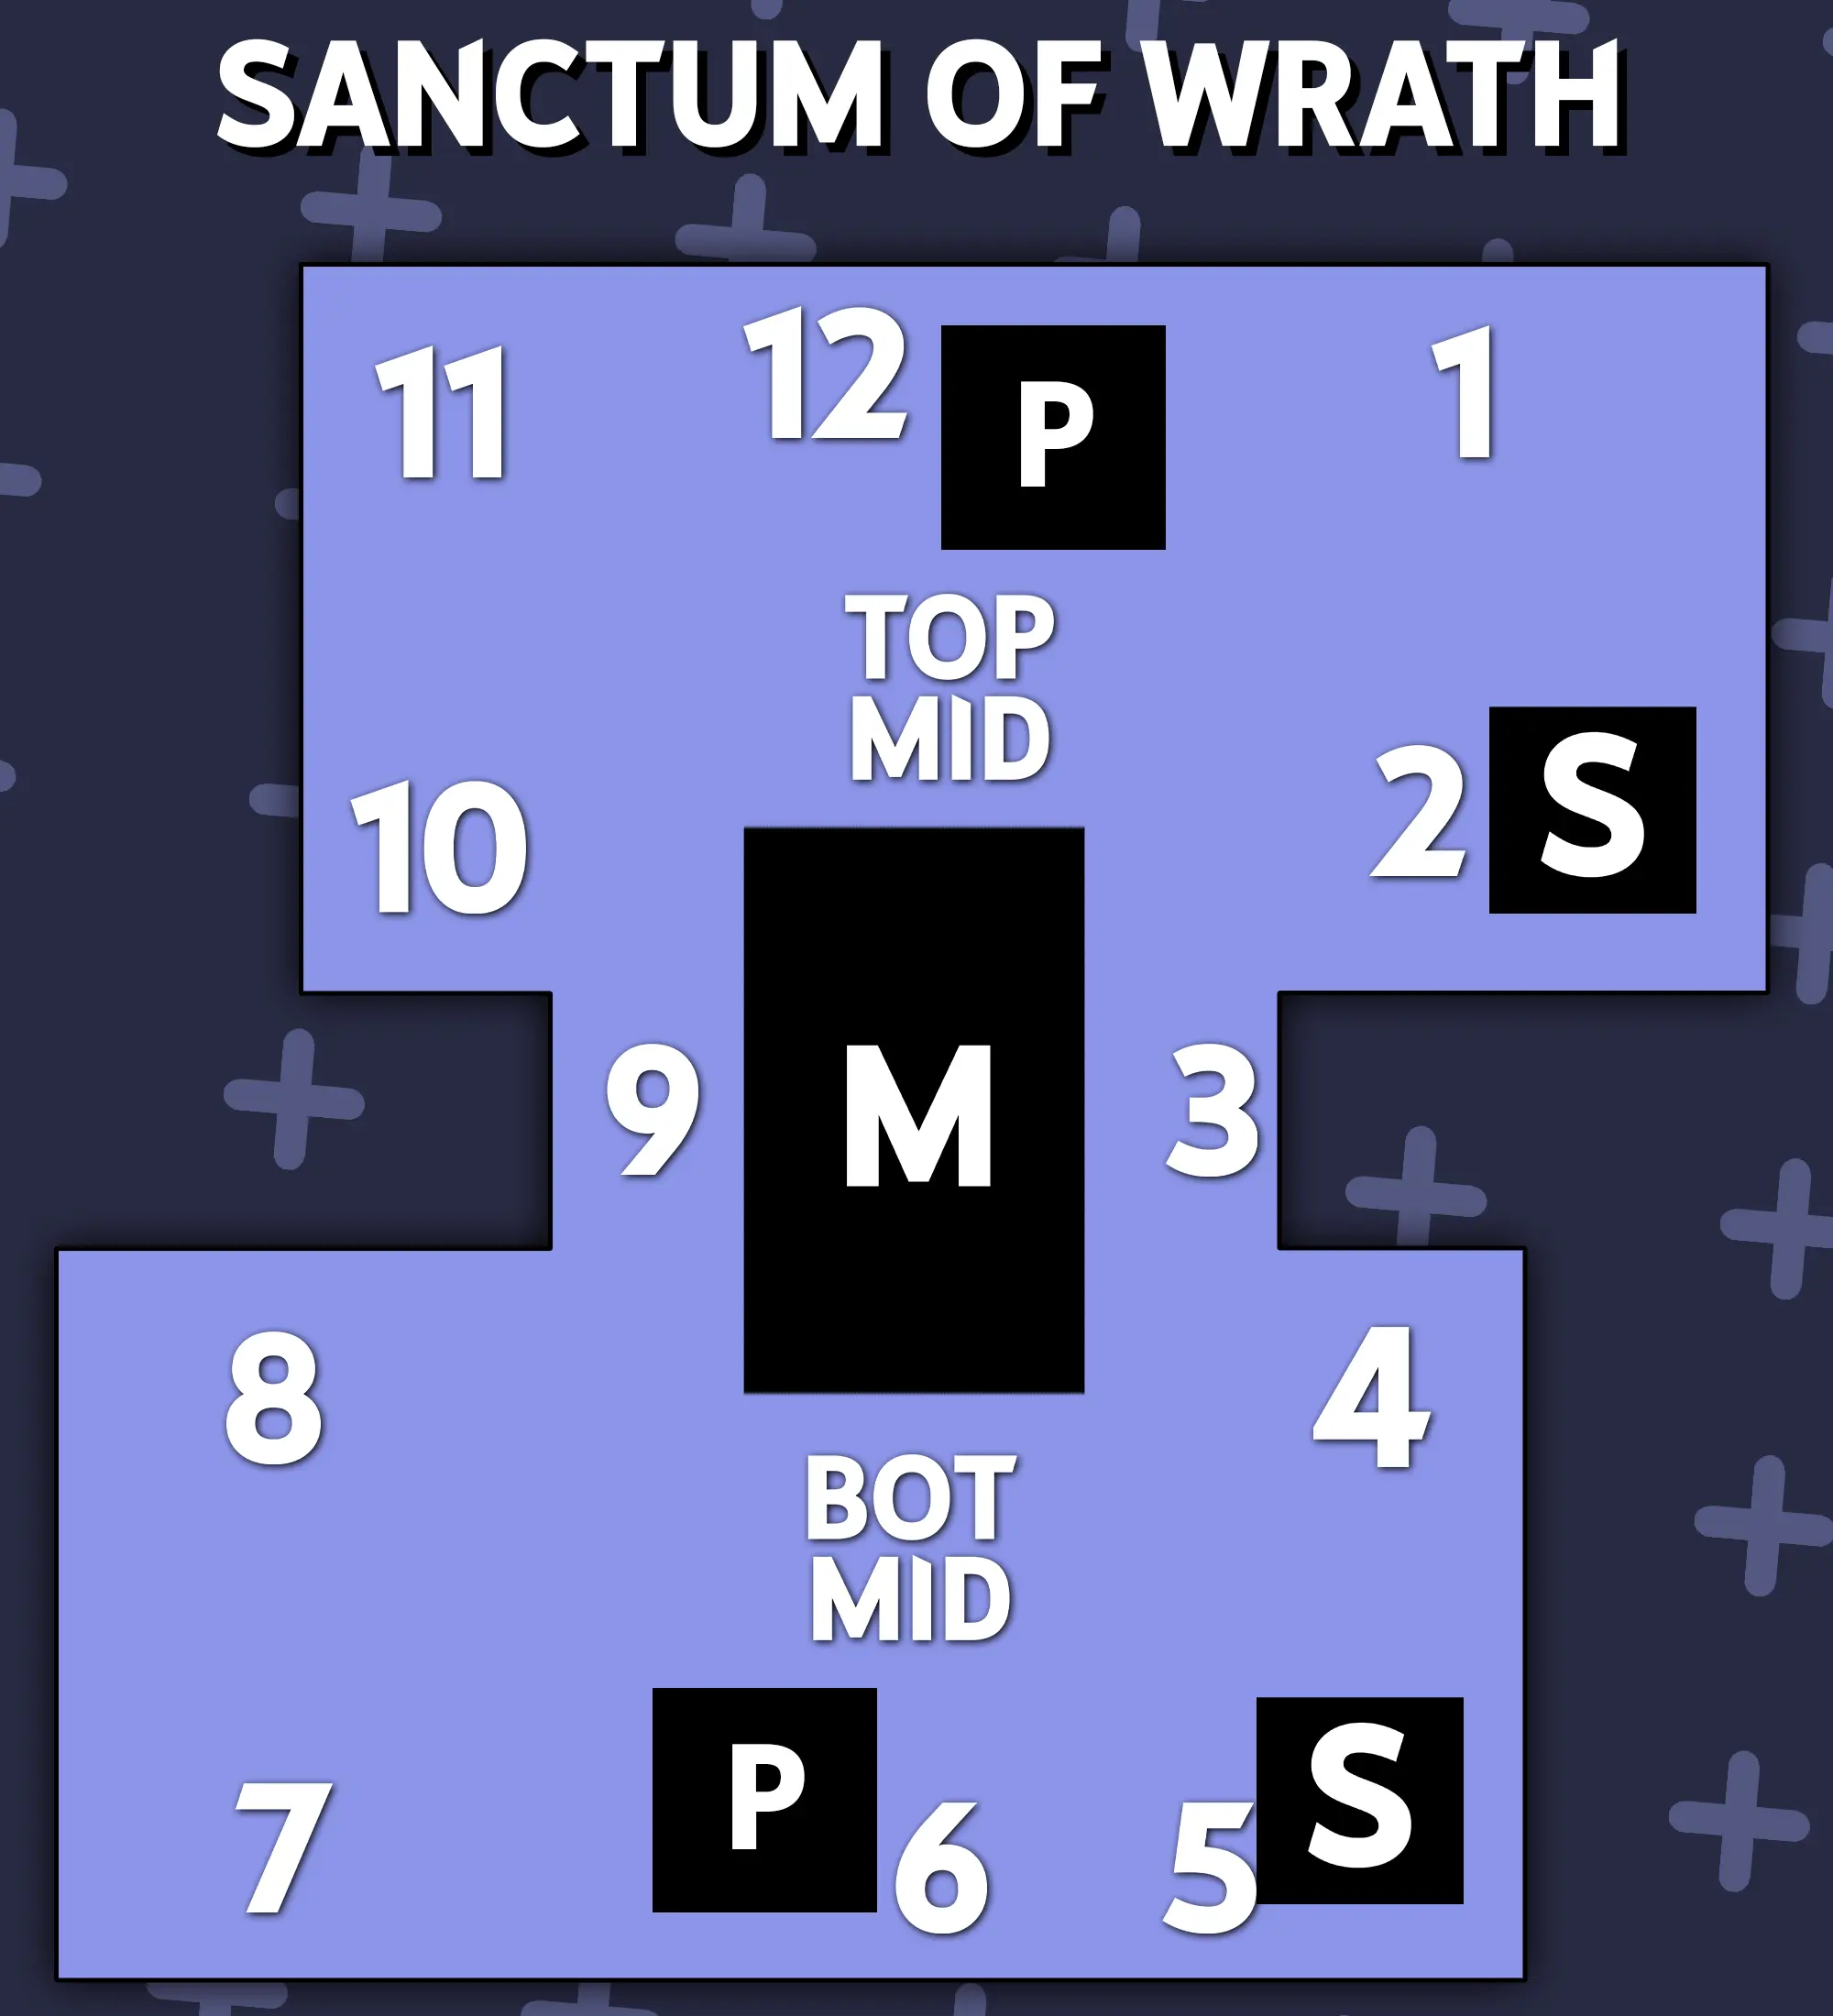
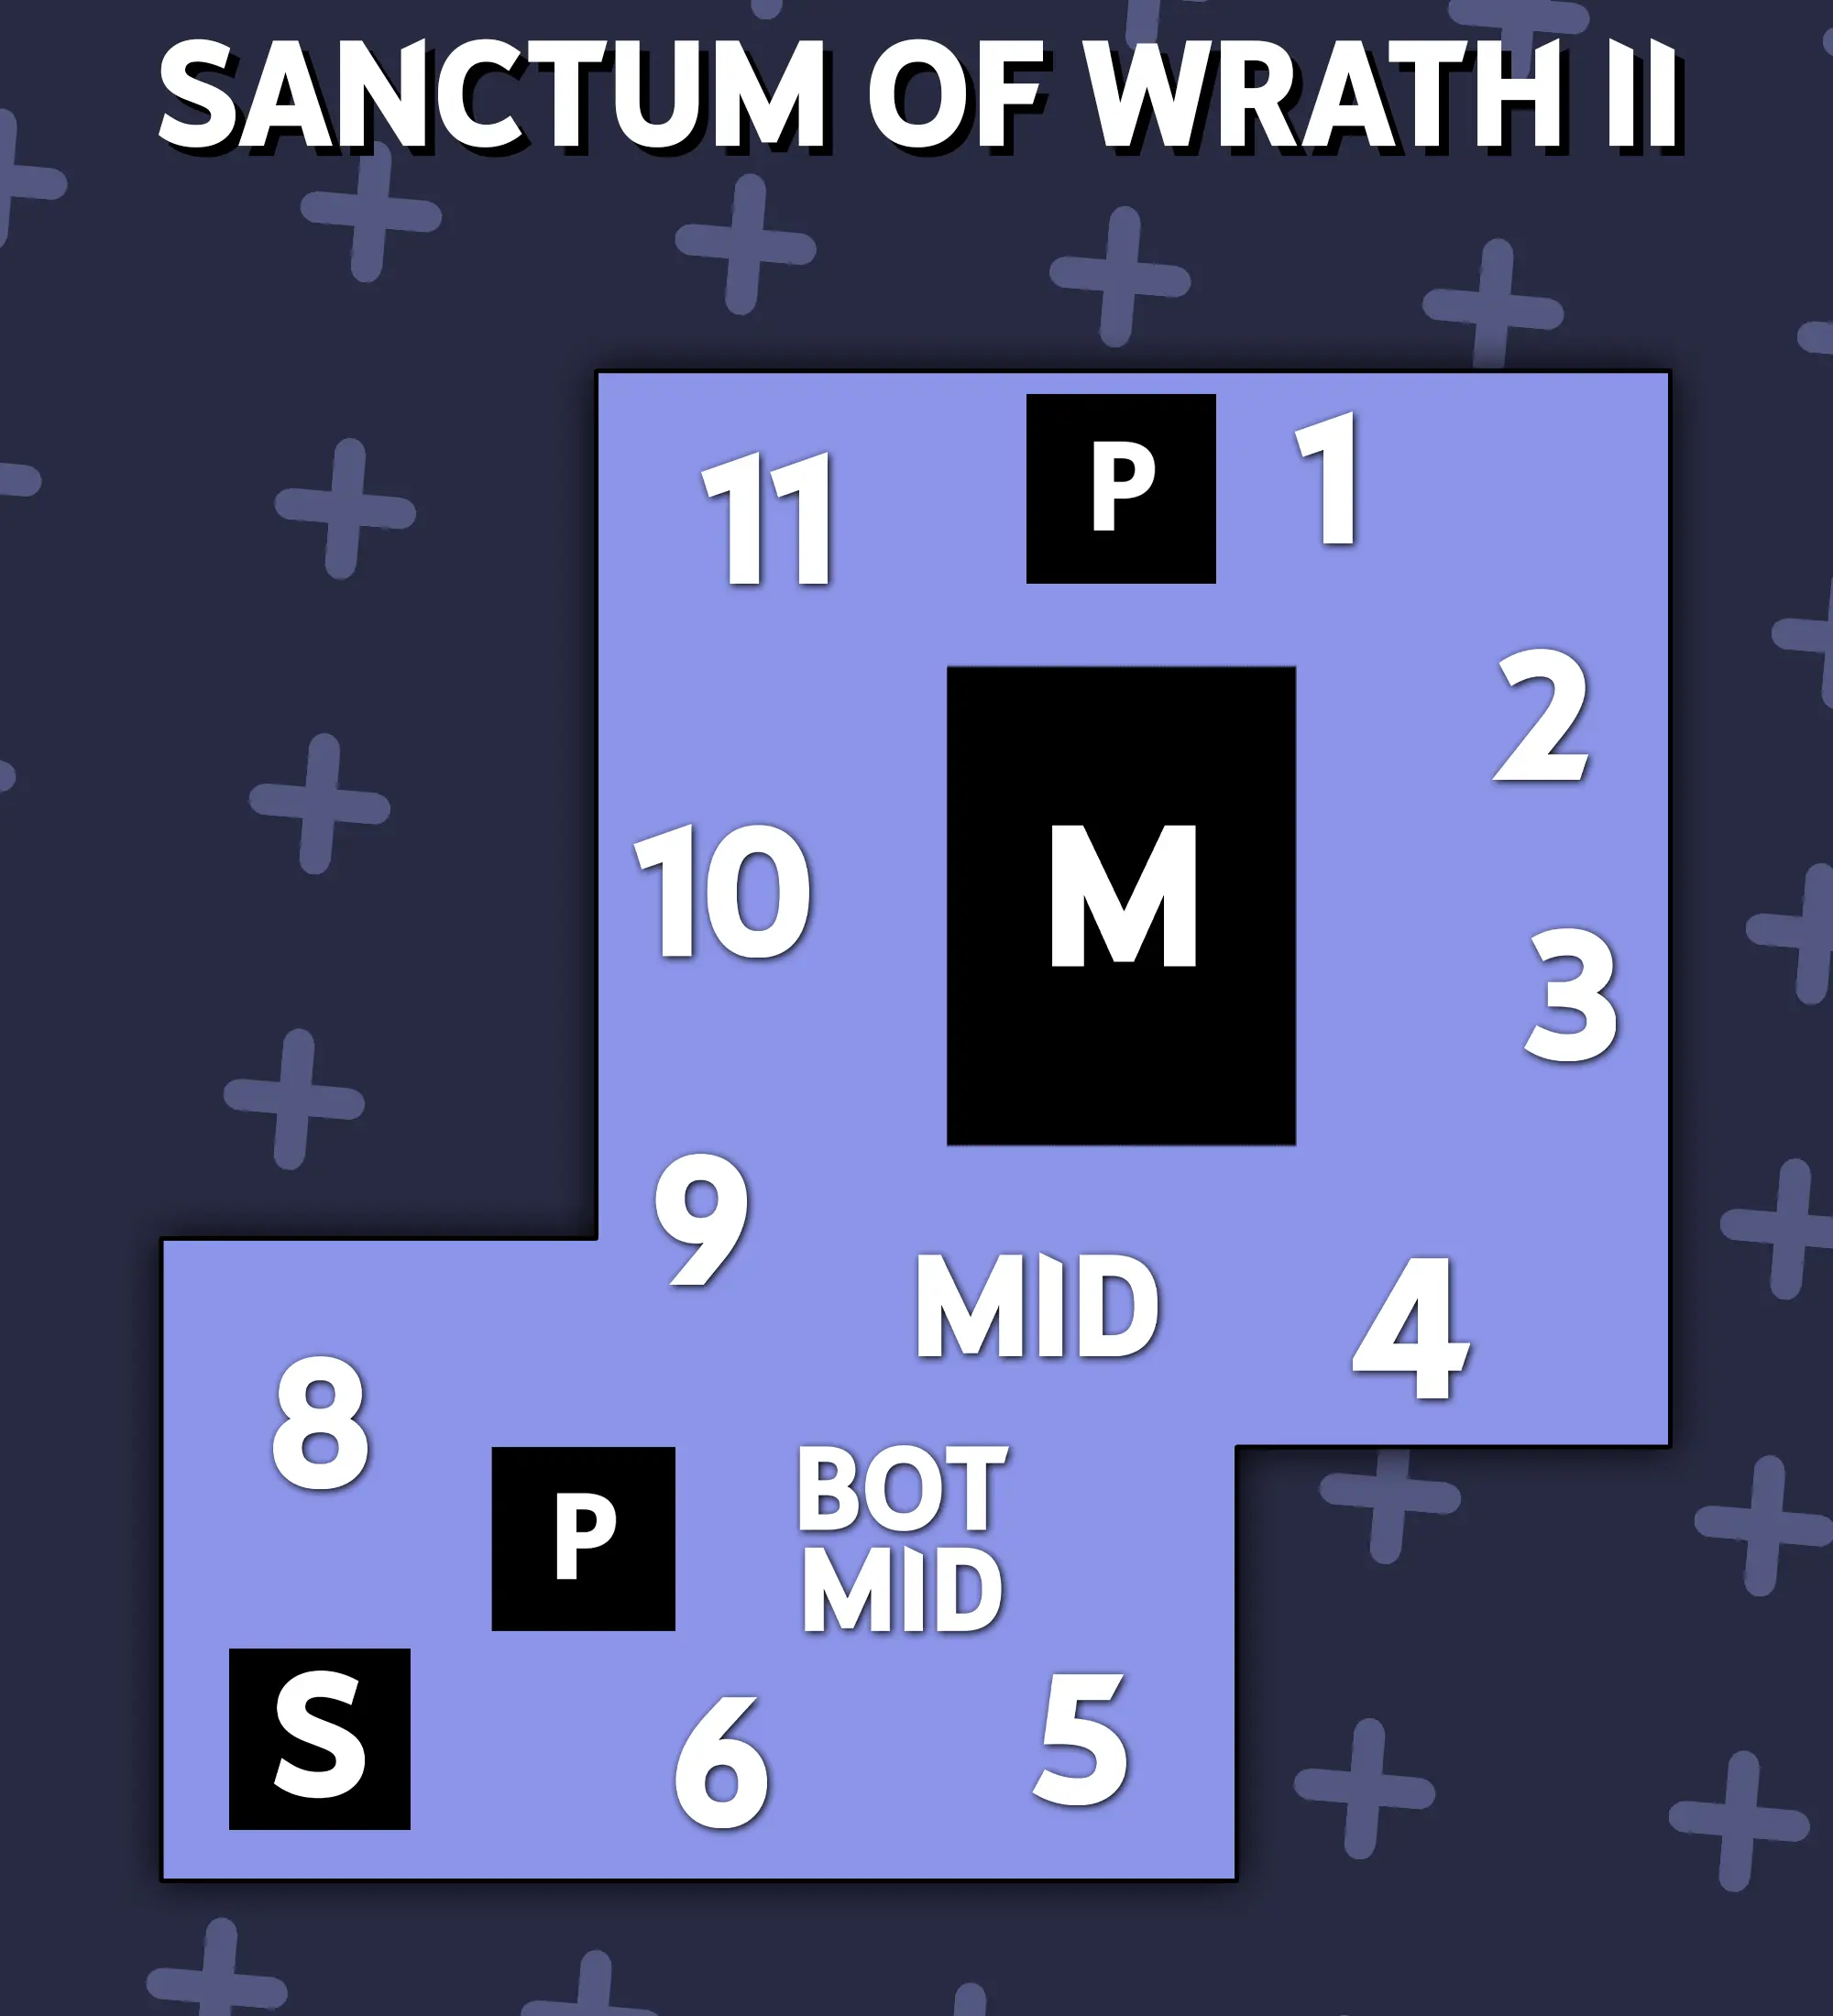
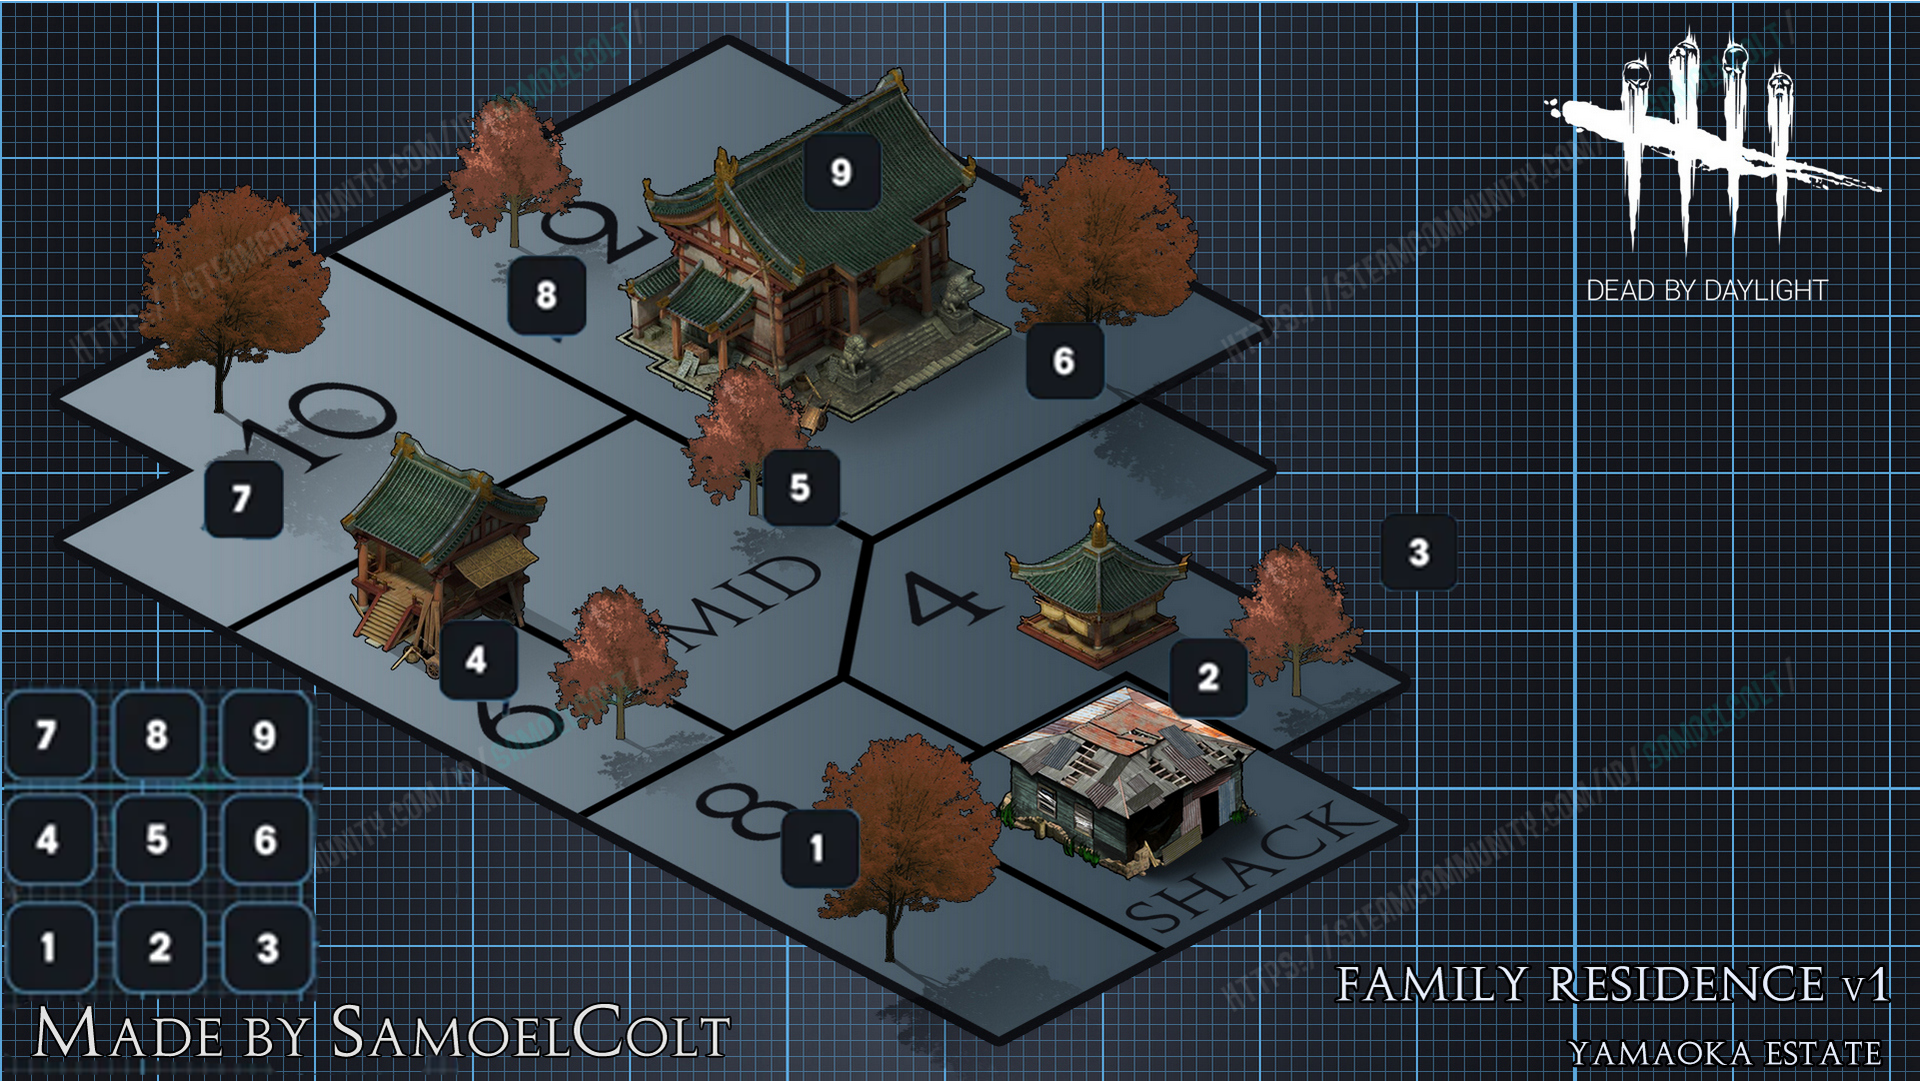
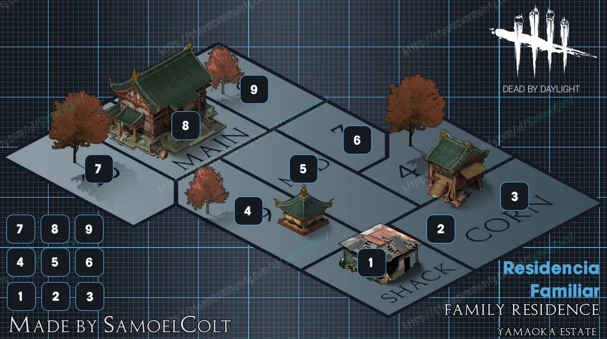
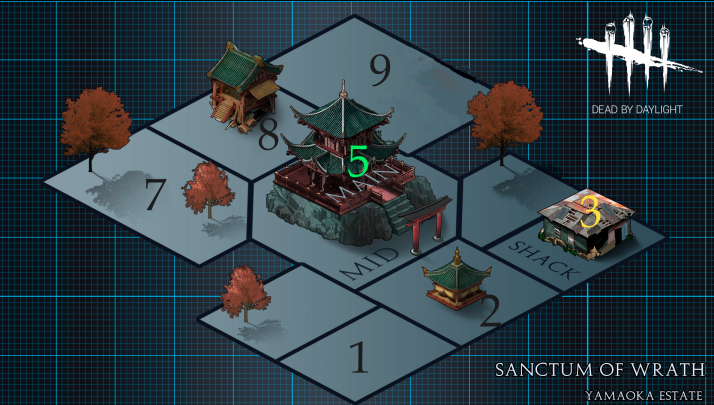
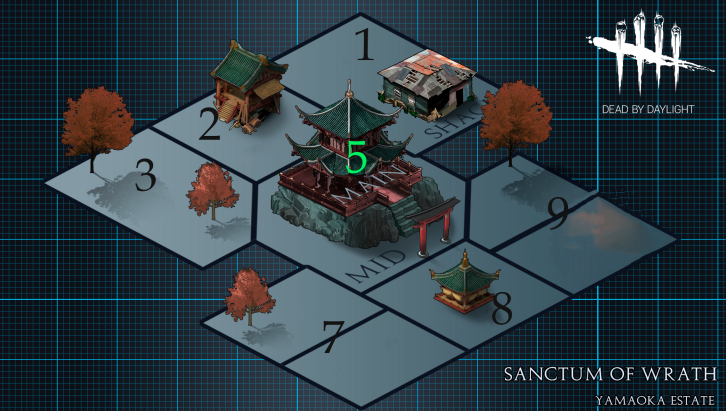
How to read the callouts for Yamaoka Estate
Map numbering is a callout system for pinpointing any position on a Dead by Daylight map with a single number. Instead of describing "the generator by the big house", you call the number and your whole team instantly knows the area you mean: it speeds up rescues, generator pressure and killer-location shouts.
Each map has two layouts. The clock splits the map like a clock face — 1 to 12 around the perimeter, with a central M marking the middle and the top mid, mid and bot mid lanes — and helps you orient yourself by direction and zone. The numpad numbers specific buildings and structures 1 to 9 over a map view, ideal for pointing at a house, the main building or an exact spot with no room for doubt.
Round out your matches with the recommended builds, the killer tier lists and the rest of the map callouts.